Shay version 0.1

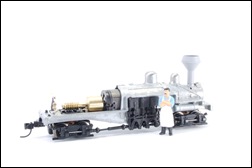
All has cooled down now and I have been able do some work on the HOn30 Shay. First of all, I have changed the diamond stack to ensure a nice and sturdy fit. Secondly, I have modeled the headlight … it’s a bit larger than the ones on the Mapleton Shays, because it has been based on the headlight of the Joe Works Shay.

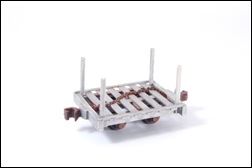
The HOn30 Shay with wholestick truck 
And last but not least, I have modeled the sides of the frame to fit the HOn30 profile. The parts have been ordered from Printapart again and they just arrived a couple of days ago. As you can see from the pictures in this post, I just couldn’t resist fitting them to the actual Atlas Shay body. I am quite pleased with the result already and both the diamond stack and the headlight will remain as they are.

Continue reading

Bloody warm …

Modelling has been a bit slow for the last couple of weeks, as we are in the midst of summer at this side of the globe. It’s bloody warm and the temperature in my workshop is close to 45º Celsius. So that gave me some time to surf the web, while sitting outside in the garden and being wirelessly connected to the internet. And that’s where I found this little gem … a beautiful 2′ gauge Shay that’s fully operational!

The Foster Brook and State Line Shay

It is a 10 tons “Class B” Shay, which means that it has three cylinders … just like my HOn30 model will have.
This little locomotive with Shop Number 3118, was built in May 1920 and is one of forty 2′ gauge Shays constructed by Lima Locomotive Works. It is also one of the only two known surviving 2′ gauge Shays … the other one is Mapleton Shay S/N 2800.

Continue reading

A Queensland pub

As I do not live in Australia myself, I am always on the lookout for Australian layouts that are based on Queensland. They can act as a good example for Queensland structures and scenery. A very interesting S scale (1:64) layout was exhibited at the Brisbane Model Train Show this year.

The pub on the Rosevale layout  
The layout is called Rosevale and is based on the south-east Division of Queensland Rail.  It is set somewhere in the 1950s and contains some great examples of Queensland buildings. I especially like the pub that is based on the Railway Hotel at Imbil and would love achieve this kind of atmosphere on my Koala Creek layout … which will certainly need to have one or more these  pubs on it … 
Watch this YouTube video, if you would like to see more of the Rosevale layout.

Shay Fever

I have probably been struck by a bad case of Shay Fever … at least that’s what it feels like. As mentioned previously, I fell in love with the tiny 13 tons “Class A” Shay locomotives and am determined to build one in HOn30.

The HOn30 Shay is slowly  progressing

I finally scored an N-scale Shay made by Atlas on eBay and replaced the body with the one that I bought a couple of months ago. The N-scale pilot steps and headlight have already been removed with the Dremel
After cleaning the 3D-printed diamond stack with acetone, I applied a couple of layers of grey primer and placed it on top of the boiler. Applying the primer, almost makes the 3D-printed part as smooth as the body itself.
There is also another method to make 3D-printed parts  smoother … apply small amounts of Superglue to the surface, but do not soak it! The Superglue will be absorbed by the 3D-printing material and will smoothen the surface. Just be careful with the fumes and do not get stuck to your printed part …

Weathering the truck

As I am not that much of a weathering expert, I decided to experiment a bit on one of the 3D-printed wholestick trucks. I started out by taking the truck apart again and spraying a layer of Tamiya grey primer on the chassis & couplers. Once this had completely dried, I applied a layer of Tank Grey from Humbrol.

The painted & weathered wholestick truck

The rust was simulated by dusting the chassis & couplers with some self-made weathering powders. They were made by sanding down pastels from Conté à Paris, which sell a great set of 12 sketching pastels with colours ranging from red-brown to black. I first applied a base of dark brown powder and sealed it with a layer of Anti-Shine Matt Varnish from The Army Painter, which is a great alternative for Testors Dullcote. After that I applied a couple of touches of red-brown powder and finished it off with a layer of Anti-Shine Matt Varnish.

Continue reading